DFlasher User Manual
This guide walks you through using DFlasher, from license purchase to completing a safe flash using the included OBD Bluetooth adapter.

1
Purchase a Flashing License
-
A DFlasher license can be purchased directly in our shop: https://shop.dflasher.com/
-
The license bundle includes the OBD Bluetooth adapter along with a flashing licence. It is a single purchase solution that unlocks the full functionality of the app.
-
During checkout, create a DFlasher account. The email you use will be linked to your license and adapter, flashing history, and help us troubleshoot individual issues if needed.
-
After purchase you will receive a confirmation email with order details.
Note: Licenses are tied to your account. Do not share your account credentials. If you already have a DFlasher account, purchase the license while logged in so it is applied automatically. A "missing license" issue is typically resolved by logging in with the account used to make the purchase.

2
Download the App
-
On your mobile device, visit the App Store (iOS) or Google Play Store (Android). Download and install the DFlasher app.
-
Open the app and accept all required permissions: Bluetooth, and location on Android, if required by the OS for Bluetooth scanning. Issues with connectivity are typically resolved by uninstalling the app and re-accepting all permissions.

3
Login
-
Log in to the DFlasher App using the same email used to create your account.
-
After login, you will arrive at the startup screen. You will have access to the side menu and the ‘connect to adapter’ button.


4
Adapter Connection
-
Locate the OBD-II port on your BMW (on the left hand side under the dash or beside the hood release).
-
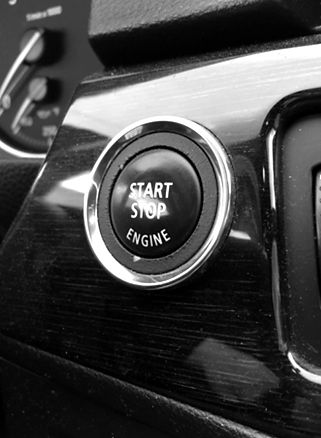
Plug the OBD adapter into the port. Turn ignition ON, but do not start the engine.
-
Tap “Connect to Adapter.” (Entering Bluetooth settings is not required, adapter connection is fully automatic)
-
Tap “Connect to Car”. The app will then direct you further.


Adapter troubleshooting pair / connect issues:
-
Ensure Bluetooth is enabled.
-
Reboot the adapter by unplugging and replugging.
-
if unable to connect to car: ensure ignition is ON and that you have a good internet connection. Wifi or mobile data can be used.
-
Android users: confirm Location permission is granted for the app (some Android versions require it for Bluetooth scanning)
5
Main Menu - Info Page
-
Once connected to the car, the app enters the main menu. In the bottom menu, there is access to 3 tabs - each with a specific function.
-
The info tab (left) gives you an overview of vehicle information and license status.
-
The flashing tab (center) is where most of the app’s work takes place. This is where you can view OTS maps or start a flashing procedure.
-
The diagnostic tab (right) is used to collect control unit information, scan for DTC’s or clear DTC’s.


6
OTS Maps
-
In the flashing tab, OTS maps are available for flashing.
-
Each OTS map includes a stage and a list of available optimizations. Click the “release notes” dropdown to see more information.
-
The app offers a Stock file extraction feature. DFlasher’s stock extraction is intended for tuners and experienced users who want the raw OEM software for map development — it is not a backup tool, nor does it backup a third-party tune.


7
Flashing
-
Choose a map and press "Flash".
-
A pre-flash checklist will appear. Follow the instructions.
-
Monitor progress bar and messages. Typical flash duration depends on the ECU state. Initial unlock lasts approx 17 min, vehicle calibration flashing only lasts approx 2 minutes.
-
Do not: close the app, unplug the adapter, turn the ignition off, or start the engine.
-
Wait for the verification success message after writing.


On the rare occasion that a flash fails:
The app will display an error and provide step-by-step guidance to recover the ECU by using special app functions.
8
Flash Successful
-
After a successful flash the “EXIT” button appears, which returns to the main menu.
-
Turn the ignition off and wait about 30 seconds for the ECU to go to sleep.
-
After 30 seconds, the engine can be started and the car is ready to drive.


SEC.